
Prepping a garage floor for epoxy involves three steps that determine whether the coating lasts: diamond grinding the concrete to create a proper bond profile, repairing cracks and salt pits, and moisture testing the slab before any coating goes down. Skipping any one of these steps causes most premature coating failures, regardless of whether the final product is epoxy, polyurea, or polyaspartic. Armor Coating Co. handles full prep on every concrete coating project across Northern Wisconsin and Minnesota, where freeze-thaw damage and moisture make proper prep non-negotiable.
Most homeowners assume the coating product itself determines whether the floor lasts, but the failures that show up six months later are almost always caused by what happened before the product was mixed. The sections below break down each prep step, the most common mistakes that cause coatings to fail, and what professional prep looks like compared to a DIY weekend.
Why Surface Prep Determines Whether the Coating Holds

Concrete is porous. Oil, moisture, and road salt work into those pores over years of use. Diamond grinding strips the damaged top layer and opens fresh concrete for the coating to grip mechanically. Acid etching, the method prescribed by most DIY kits, cleans the surface but doesn’t create the profile a professional coating needs to bond.
In Northern Minnesota and Wisconsin, freeze-thaw cycles make this step even more critical. Water enters micro-cracks, expands, and weakens the surface layer over dozens of winter cycles. Grinding removes that compromised concrete and exposes solid material underneath. The performance gap between epoxy and polyurea narrows dramatically when both start on a properly ground slab.
The Step-by-Step Prep Process

Every durable garage floor coating follows the same prep sequence, regardless of whether the final system is epoxy, polyurea, or polyaspartic.
Diamond Grinding and Edge Work
A planetary diamond grinder removes the top layer of concrete along with any old sealer, paint, or failed coating. A hand grinder follows along edges, corners, and around obstacles where the floor grinder cannot reach. This eliminates the uncoated ring that lets moisture wick under the coating from walls and expansion joints.
Crack and Salt Pit Repair
Cracks and salt pits get filled with a flexible filler that moves with the slab instead of cracking again. Road salt damage is especially common in Duluth, MN garage floor projects, where most floors need some pit repair before coating.
Cleaning and Moisture Testing
All grinding dust gets vacuumed with a HEPA-filtered system and the surface is solvent-wiped to remove remaining oils. A calcium chloride moisture test confirms vapor transmission is within the coating’s tolerance. If levels run too high, the slab needs a vapor barrier before any coating goes down.
Prep Mistakes That Make Coatings Fail
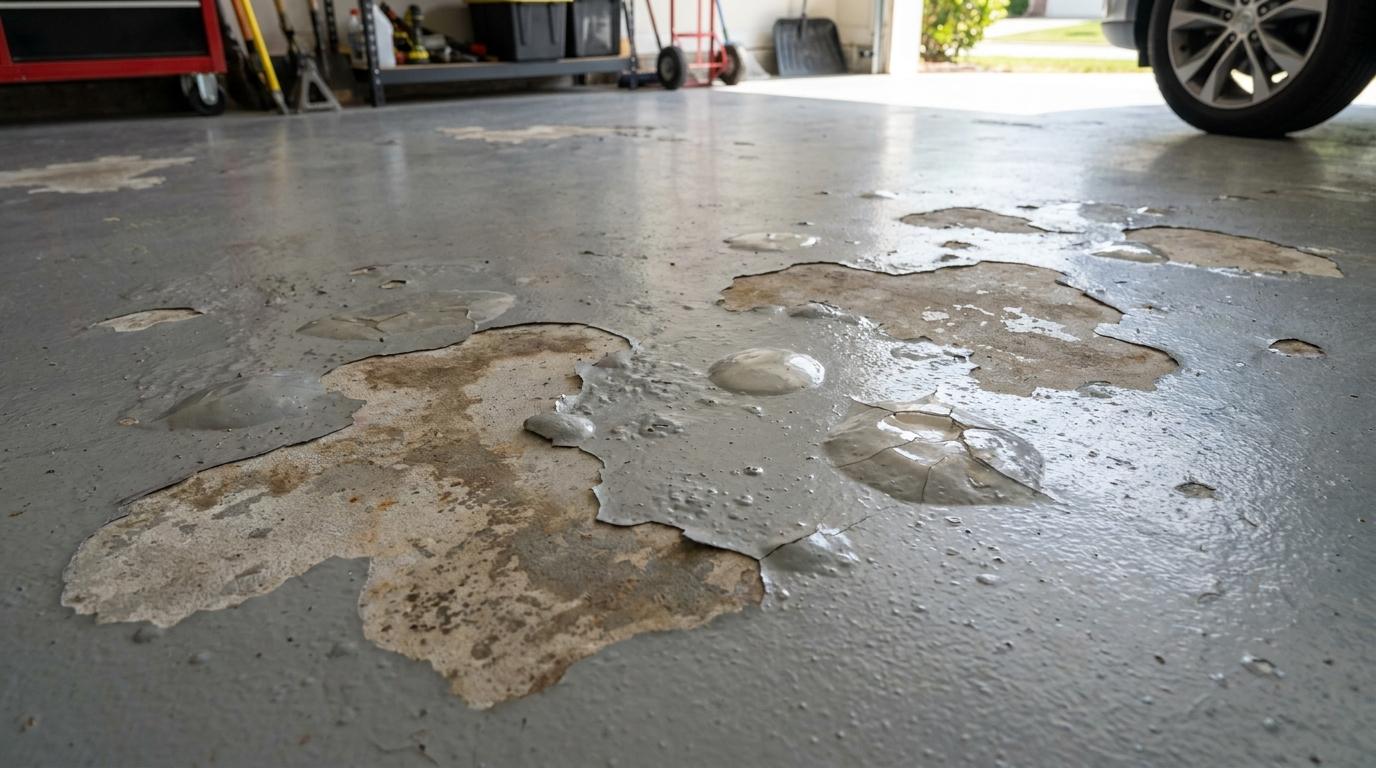
Most garage floor coating failures are avoidable and are rooted in three major shortcuts taken during preparation.
Acid Etching Instead of Grinding
Acid etching instead of grinding is the most common shortcut. It cleans but does not create the mechanical profile coatings need. Floors etched instead of ground regularly delaminate within one to three years, regardless of what coating goes on top.
Coating Over Excessive Moisture
Coating over moisture is the second major failure. Concrete slabs in Northern Wisconsin sit on soil that holds water through spring snowmelt. If vapor transmission exceeds the coating’s tolerance, bubbles and blisters show up within months.
Skipping Old Coating Removal
Not removing the previous coating is the third mistake. Layering new epoxy or polyaspartic over old paint or sealer traps contaminants and leads to peeling. Proper diamond grinding reverts the slab to bare concrete and makes the surface rough enough so the new system mechanically bonds to the slab.
Frequently Asked Questions
Can you apply epoxy over a painted garage floor?
Epoxy can be applied over a painted garage floor only if the old paint is fully removed first. Diamond grinding strips the existing paint and creates the surface profile the new coating needs for permanent adhesion. Applying over old paint traps contaminants between layers and leads to peeling within months.
How long does garage floor prep take?
Garage floor prep typically takes three to five hours for a standard two-car garage, depending on concrete condition. Floors with heavy oil stains, salt pits, or old coatings need additional grinding and repair time. Armor Coating Co. completes most prep-and-coat projects within a single day.
Is acid etching enough to prep a garage floor for coating?
Acid etching is not enough to prep a garage floor for a professional-grade coating. Etching cleans the surface and removes some contaminants, but it does not create the mechanical bond profile that diamond grinding produces. Coatings applied over acid-etched concrete have a significantly higher failure rate within the first three years.
Prep Work Determines Your Floor’s Future

The coating chemistry matters, but it can’t compensate for shortcuts made during prep. Diamond grinding, crack repair, moisture testing, and thorough cleaning determine if a garage floor coating lasts one year or fifteen. The difference between a floor that peels and one backed by a 15-year warranty almost always comes down to the hours spent before any coating is applied.
Armor Coating Co. installs polyurea and polyaspartic garage floor coatings across Hayward, Spooner, Rice Lake, Duluth, and the surrounding tri-state area, with full diamond grinding on every project. Most installations are done in a single day, with vehicles back on the floor within 24 hours. Call (715) 934-9037 or request a free estimate online.

I’m Chad Nicks, owner of Armor Coating Co. My team and I offer high-quality, durable concrete coatings in Duluth, MN, and Northern Wisconsin. With innovative products four times stronger than epoxy, our family-owned business provides lasting solutions for both residential and commercial spaces.
Email: chad@armorcoatingco.com
Facebook: https://www.facebook.com/ArmorCoatingCompany
Instagram: https://www.instagram.com/armorcoatingco/